OSPF used to only support plain text and MD5 authentication but since IOS 15.4(1)T, OSPF also supports HMAC-SHA (Hash Message Authentication Code Secure Hash Algorithm). Besides the new algorithm, the way you configure authentication has also changed. OSPF now uses key chains like RIP and EIGRP.
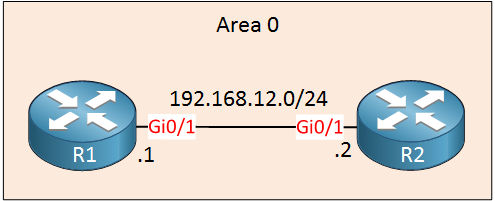
To demonstrate HMAC-SHA authentication, we will use these two routers:
Configuration
Let’s start by enabling OSPF on both routers:
R1(config)#router ospf 1
R1(config-router)#network 192.168.12.0 0.0.0.255 area 0R2(config)#router ospf 1
R2(config-router)#network 192.168.12.0 0.0.0.255 area 0Now we can focus on authentication.
R1
First, we have to create a key chain. The name of the key chain is only locally significant so pick whatever you like. The key ID has to be the same on both routers. I’ll name it R1 and use key 1:
R1(config)#key chain R1
R1(config-keychain)#key 1
In the key chain configuration, there are two things we have to do. First, we have to tell the router that we want to use a different cryptographic algorithm:
R1(config-keychain-key)#cryptographic-algorithm ?
  hmac-sha-1    HMAC-SHA-1 authentication algorithm
  hmac-sha-256  HMAC-SHA-256 authentication algorithm
  hmac-sha-384  HMAC-SHA-384 authentication algorithm
  hmac-sha-512  HMAC-SHA-512 authentication algorithm
  md5           MD5 authentication algorithm
As you can see above, we can choose one of the HMAC-SHA options. MD5 is also supported for this new key chain method. Let’s use the most secure HMAC-SHA options:
R1(config-keychain-key)#cryptographic-algorithm hmac-sha-512The other thing we have to configure is the key string, the password that we want to use:
R1(config-keychain-key)#key-string R1_R2_PASSWORDThe only thing left to do now is to enable authentication. This can only be done on the interface, you can’t enable it for the entire area using this method:
R1(config)#interface GigabitEthernet 0/1
R1(config-if)#ip ospf authentication key-chain R1
Let’s do the same thing on R2:
R2
R2(config)#key chain R2
R2(config-keychain)#key 1
R2(config-keychain-key)#cryptographic-algorithm hmac-sha-512
R2(config-keychain-key)#key-string R1_R2_PASSWORD

R2(config)#interface GigabitEthernet 0/1
R2(config-if)#ip ospf authentication key-chain R2
That’s all we have to configure.
Verification
Let’s verify our work. First, I’ll check if authentication is enabled or not:
R1#show ip ospf interface GigabitEthernet 0/1 | begin auth
  Cryptographic authentication enabled
Sending SA: Key 1, Algorithm HMAC-SHA-512 - key chain R1R2#show ip ospf interface GigabitEthernet 0/1 | begin auth
Cryptographic authentication enabled
Sending SA: Key 1, Algorithm HMAC-SHA-512 - key chain R2As you can see above, authentication is enabled using HMAC-SHA-512. Let’s make sure our two routers are neighbors:
R1#show ip ospf neighbor

Neighbor ID     Pri   State           Dead Time   Address         Interface
192.168.12.2 1 FULL/DR 00:00:31 192.168.12.2 GigabitEthernet0/1R2#show ip ospf neighbor
Neighbor ID Pri State Dead Time Address Interface
192.168.12.1 1 FULL/BDR 00:00:33 192.168.12.1 GigabitEthernet0/1Which seems to be the case. That’s all there is to it.
Unit 1: Introduction to OSPF
- Introduction to OSPF
- Basic OSPF Configuration
- OSPF Multi Area Configuration
- OSPF Reference Bandwidth
- OSPF Plain Text Authentication
- OSPF MD5 Authentication
- OSPF SHA-HMAC Authentication
- OSPF TTL Security Check
- OSPF Default Route
Unit 2: OSPF Neighbor Adjacency
- OSPF LSA Types
- OSPF LSAs and LSDB Flooding
- OSPF Hello and Dead Interval
- OSPF Router ID
- OSPF Packets and Neighbor Discovery
- OSPF DR/BDR Election
- OSPF Passive Interface
- Troubleshooting OSPF Neighbor Adjacency
Unit 3: OSPF Network Types
- OSPF Non-Broadcast Network Type
- OSPF Broadcast Network Type
- OSPF Point-to-Multipoint Network Type
- OSPF Point-to-Multipoint Non-Broadcast Network Type
- OSPF Point-to-Point Network Type
- OSPF Next Hop with Network Types
Unit 4: OSPF Stub Areas
- Introduction to OSPF Stub Areas
- How to configure OSPF Stub Area
- How to configure OSPF Totally Stub
- How to configure OSPF NSSA (Not So Stubby) Area
- How to configure OSPF Totally NSSA (Not So Stubby) Area
- OSPF NSSA P-bit explained
Unit 5: Advanced OSPF Topics
- OSPF Summarization
- OSPF Distribute-List Filtering
- OSPF LSA Type 3 Filtering
- OSPF LSA Type 5 Filtering
- OSPF Virtual Link
- OSPF Virtual Link Authentication
- OSPF Path Selection Explained
- How to read the OSPF Database
- OSPFv3 for IPv4
- Troubleshooting OSPF Route Advertisement
- OSPF SPF Scheduling and Throttling
- OSPF LSA Throttling
- OSPF Incremental SPF
- OSPF Prefix Suppression
- OSPF Stub Router
- OSPF Graceful Shutdown
- OSPF Graceful Restart
- OSPF Loop-Free Alternate (LFA) Fast Reroute (FRR)
- OSPF Remote Loop-Free Alternate (LFA) Fast Reroute (FRR)